Does your favorite stuffed animal need a wardrobe update? Making mini clothing is a fun craft that allows you to create one-of-a-kind outfits tailored perfectly for your plush pals. If you’re short on time, here’s a quick answer to your question: Start with easy patterns like rectangles or squares for shirts, skirts, pants, and dresses.
Choose fabrics that are soft like felt, fleece, or flannel. Hand sew using a basic running stitch, whip stitch, or ladder stitch, or use hot glue for faster construction. Add cute details like trim, buttons, fabrics patterns to personalize each outfit.
In this comprehensive guide, you’ll learn everything you need to create a full wardrobe from scratch. We’ll cover choosing fabrics and patterns for variety of clothing items, key tools and materials, sewing techniques for small pieces, embellishments that make the outfits unique, how to size the garments, and tips for customizing outfits with accessories.
Gather Your Materials and Tools
Before you start making cute little outfits for your stuffed animals, you’ll need to get some basic sewing supplies together. Having the right materials on hand will make the project go much more smoothly.
Fabric
The most important item is fabric for the clothes. Some good options include:
- Felt – this material doesn’t fray so no hemming is needed. It comes in tons of fun colors and patterns too.
- Flannel – super soft and cozy for pajamas or winter wear.
- Cotton – durable and breathable for t-shirts, dresses, pants, etc.
Make sure to choose fabrics that can withstand some reasonable wear and tear. And it doesn’t hurt to have some extra on hand for mistakes, changes in design, or future projects.
Notions
You’ll also want to stock up on:
- Thread – go with standard all-purpose thread. Match the color to your fabric.
- Buttons, snaps, hook & eye closures – for accessorizing!
- Ribbon, lace, trim – fun for decorating clothes.
- Poly-fil stuffing – to pad vests, jackets, pillows or bedding.
Tools
As for tools, here’s what you’ll need:
- Sewing needles – sharp points make stitching easier.
- Pins – to temporarily hold pieces together pre-stitching.
- Fabric scissors – only use for cutting fabric to keep blades sharp.
- Seam ripper – for fixing any sewing mistakes.
- Measuring tape
- Chalk or fabric marker
You probably already have most of these supplies for basic mending jobs. But it never hurts to equip your craft closet with some additional materials when taking on new sewing projects like tiny stuffed animal fashions. 👗🧵
Once you’ve gathered everything on the list, you’ll be ready to start designing cute handmade outfits. Browse sites like The Spruce Crafts for free sewing patterns and clothing ideas to spark your creativity. Then let the sewing fun begin! 😊👍
Choose Patterns and Fabrics
Selecting the right pattern and fabric is crucial when sewing clothes for your beloved stuffed animals. The type of fabric you choose can make all the difference in how the outfit turns out. Consider things like stretch, thickness, and texture when picking materials.
You’ll also want to find a pattern that fits your skill level and your stuffed friend’s unique size and shape.
Get the Right Measurement
The first step is measuring your stuffed pal to ensure you find patterns cut to the proper dimensions. Use a soft measuring tape to carefully gauge the length, width, and girth of the animal in inches. Jot these numbers down to reference when shopping.
Many stuffed toy patterns include multiple sizes, but double check that the dimensions match those of your furry friend.
Match Fabric to Animal Type
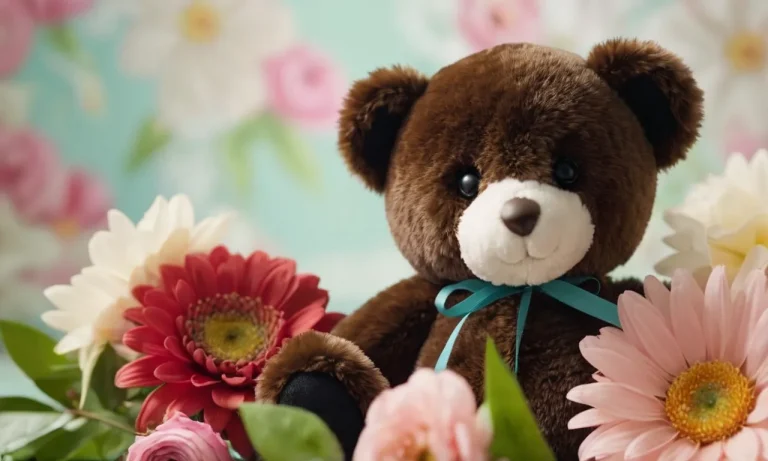
Next, think about what fabric best suits the stuffed animal species and personality. For instance, fluffy faux furs or soft brushed cotton may be fitting for a teddy bear. Scaled or fish print fabrics work nicely for stuffed sharks and other sea creatures.
Superhero stuffed animals may look dashing in shiny spandex or metallic fabrics. Ultimately, get creative and choose textiles that you think complement the toy!
Consider Fabric Properties
Factor in practical characteristics depending on the type of outfit or accessory you’re sewing as well. For example, clothes that need to stretch like t-shirts, hoodies, and superhero costumes may call for knit fabrics with spandex.
Dresses, skirts, and coats made from non-stretch wovens can still move and flow nicely. Felt is excellent for hats and bags that hold their shape. Water-resistant nylons or vinyls make great rain gear. Check pattern descriptions for recommendations on the best fabric types.
Prewash and Press Fabrics
It’s wise to prewash and press your fabrics before cutting and sewing to allow for any shrinking. Wash in cold water, then machine or air dry and iron the textiles. Now they will be ready for measuring, marking, and cutting without surprises.
This pre-treating ensures quality results that will hold up nicely in the future as well.
Have Fun Choosing Cute Prints!
Perhaps most importantly, pick fabric prints that spark joy! 😊 Adorable stuffed animals deserve the cutest kitty prints, funky emoji prints, vibrant rainbow prints, pretty floral prints, or whatever puts a smile on your face.
Scale down adult prints in lively colors and fun motifs to doll and stuffed animal sizes for playful patterns. Mix and match coordinating prints for dynamic outfits. The options for creative self-expression here are endless. 👍
By considering your stuffed friend’s measurements, texture, stretch, and personality when selecting materials, you’ll be sure to stitch up snuggly handmade outfit perfection! For more helpful tips, check out the sewing guides on Craftsy and The Spruce Crafts.
Measure Your Stuffed Animal and Size
The first step in making custom clothes for your beloved stuffed animal is to carefully measure it. Having accurate measurements will ensure the clothes you sew fit properly and look fantastic.
Measure Length and Width
Use a flexible cloth measuring tape to measure the length and width of your stuffed animal. Note the widest points from side to side as the width. For length, measure from the top of the head to the bottom of the feet (or wherever you want the clothing to end). Record these numbers.
Measure Circumferences
Next, wrap the tape measure around the widest part of the chest to get the chest circumference. Do the same for the waist, hips, arms, legs, neck, or any other areas you want to fit clothing around. Having all the circumferences will allow you to tailor each garment piece for a custom fit.
Consider Seam Allowances
When drafting your pattern pieces, be sure to add seam allowances to each measurement. For most stuffed animal fabrics, a 1/4″ to 1/2″ seam allowance is sufficient. This extra width around the edges gives you room to sew pieces together accurately.
Size Your Pattern
Use your measurements to create proportional pattern shapes that match your stuffed animal. For example, if the chest circumference is 12″ around and the waist is 8″ around, draft a bodice pattern piece with those dimensions.
Scale other features like arm holes, necklines, and leg openings accordingly.
Recording precise measurements is crucial for great results sewing tiny stuffed animal clothes. So don’t rush this first step! Taking the time to properly measure will set you up for sewing success with perfectly sized fashions.
With measurements in hand, you can confidently choose patterns or draft your own designs scaled exactly right for your special stuffed friend. They will look so cute strutting their new handmade outfit made just for them.
Sew Clothing Pieces
Making adorable outfits for your beloved stuffed animals is a fun and rewarding DIY project. With some basic sewing skills and supplies, you can create a full wardrobe of clothes tailored perfectly to your furry friends.
Purchase Supplies
First, gather the necessary materials. You’ll need fabric like felt or fleece that won’t fray. Make sure to pick soft, lightweight fabrics that won’t overwhelm your petite stuffed models. You can find a nice selection of stuffed animal-sized fabrics at your local craft store or even repurpose old t-shirts and socks.
Next, stock up on things like thread, pins, fabric scissors, a measuring tape, and other basic sewing notions. Miniature buttons, ribbons, lace, and trim make excellent embellishments too. Don’t forget the sewing machine unless you plan to stitch everything by hand!
Make a Pattern
Creating a custom pattern is easier than it sounds. Simply trace the outline of your stuffed animal onto paper, allowing some ease for things like sleeves and pant legs. Add desired lengths and style details.
You can make multiple copies of the foundation pattern and modify them into different outfits.
For example, trace a basic bodice sloper then extend it into a dress pattern. Use the same base to design pants by adding length and separate leg tracings. Customize each pattern with unique style lines – try flounces, ruffles or a peplum hem for girly looks.
Cut Out Pieces
Pin your finished pattern pieces to fabric and cut them out. Mark any seam allowances or necessary balance points directly onto the fabrics. Felt and fleece won’t fray so you can skip finishing the raw edges. However, lighter fabrics may require zigzag or serged seams to prevent unraveling.
Trim allowance will depend on your desired look and the scale of your stuffed animal clothes. Generally 1⁄4 to 1⁄2 inch seam allowances work well. Cut two copies of each garment piece, one for the front and one for the back.
Assemble the Outfit
Now comes the fun part – time to stitch it all together! Refer to your pattern markings as you join the front and back sections. Right sides should face inwards. Insert zippers or use Velcro closures if needed for fit. Don’t forget details like pockets, buttons, and trims.
The best finishes involve nicely pressed or top-stitched seams so they lie flat against the fluffy fill inside. Add hook and eye closures, elastic bands, or ties to keep the garments securely on. Congrats, your stuffed animal’s custom clothing is ready to show off!
Embellish with Cute Accessories and Details
Adding cute embellishments and special details is a fun way to make your stuffed animal’s outfit truly unique and adorable. Small touches like buttons, ribbons, lace, appliques, and embroidery can transform a basic stuffed animal outfit into something magical.
Buttons
Buttons make great eyes for stuffed animals, but you can also sew them onto clothes as embellishments. Go for big, bright buttons in fun shapes like stars, hearts, and flowers. Plastic craft buttons are affordable and easy to find. Or reuse buttons from old clothes for a vintage vibe.
Tip: Use strong upholstery thread when attaching buttons to withstand stuffed animal play and love 💕
Ribbons
Ribbons are perfect for adding a pop of color or pattern. Tie ribbons around waists, necks, wrists, or ankles for accent details. For easy sewing, use grosgrain or other ribbons with finished edges that won’t fray.
Try ribbon embroidery by stitching ribbons onto clothes in decorative patterns. This ribbon embroidery tutorial has some beautiful ideas!
Lace
Add delicate lace details just like human fashion designers! Sew lace trim along hemlines, cuffs, waists, or as an inset panel in a dress. White or black lace provides high contrast, but don’t be afraid to get creative with colors too.
Tip: Stiffen lightweight lace with fabric stiffener before sewing to prevent stretching and rippling.
Appliques
Iron-on appliques allow you to easily decorate clothes without advanced sewing skills. Flower shapes, animals, and geometric designs are popular. Felt, sequins, and sparkly fabric appliques make clothes shine!
You can also sew custom applique shapes cut from fabric scraps. This applique tutorial on MarthaStewart.com walks through how to whip stitch fabric edges for a polished look.
Embroidery
Embroidery with floss or yarn makes a stuffed animal’s outfit extra special, while allowing you to showcase your stitching skills! Hand embroider designs on front panels, sleeves, collars, or hemlines using fun decorative stitches like chain stitch and satin stitch.
Not sure where to start? Try easy embroidery projects like stitching your stuffed animal’s initial. This embroidered handkerchief tutorial from AllFreeSewing.com shows how first timers can master simple embroidery.
Get creative embellishing your stuffed animal fashions! The right touches make all the difference in creating truly pawsome pieces 😸
Conclusion
Making stuffed animal clothes is an imaginative DIY sewing project. Start with simple designs, soft fabrics, and hand sewing techniques to create one-of-a-kind tiny fashions. Mix and match different patterns, prints, trims, and textiles for variety.
Dress them up further with mini hats, shoes, jewelry and other micro accessories. Your furry friends will look so cute in their new handmade wardrobes!