Do you want to learn how to make adorable stuffed animals out of yarn? Creating homemade plushies is a fun and rewarding craft that anyone can learn. If you’re short on time, here’s a quick answer to your question: the basic steps are choosing a pattern, gathering supplies like yarn and stuffing, sewing pieces together, stuffing the animal, and adding final decorative details like eyes.
In this comprehensive guide, you’ll learn everything you need to know about making stuffed animals out of yarn. We’ll cover how to find the right patterns, what supplies you need, sewing and stuffing techniques, adding details like facial features, and tips for taking your creations to the next level.
Choosing a Stuffed Animal Pattern
Amigurumi patterns
If you want to make a cute stuffed animal out of yarn, amigurumi patterns are a great option. Amigurumi is the Japanese art of knitting or crocheting little stuffed animals and figures. There are tons of free and paid amigurumi patterns available online for making adorable animals out of yarn.
Many amigurumi patterns are available for free on sites like Amigurumi To Go and All About Ami. These free patterns are often for basic animals like cats, dogs, bears, and bunnies. They are a good option if you are a beginner.
There are also lots of paid amigurumi patterns available on sites like Etsy and Ravelry, where experienced designers sell their patterns. These tend to include more unique and complex designs like pandas, lions, turtles 🐢 and fantasy creatures.
The paid patterns often come with helpful photos and tips too.
Sewn stuffed animal patterns
Instead of knitting or crocheting, you can also sew cute stuffed animals out of felt, fleece or fabric. There are lots of fun printed fabrics that work well for bright and whimsical stuffed animals.
Free sewing patterns for stuffed animals can be found at sites like MakeSmith Patterns and AllFreeSewing. These include animals like monkeys 🐒, turtles🐢, pigs 🐷 and dinosaurs 🦖.
Some amazing paid sewing patterns are sold on Etsy, including more complex designs like mermaids🧜♀️, unicorns🦄 and dragons🐉. These patterns often have more detail and guidance to help you make a professional looking stuffed animal.
Free patterns vs paid patterns
Here’s a comparison of some key differences between free patterns and paid patterns for stuffed animals:
| Free Patterns | Paid Patterns | |
|---|---|---|
| Cost | Free | $5 – $20 typically |
| Difficulty | Tend to be simpler | Range from simple to complex |
| Guidance | Often just written instructions | Include photos, tips and guidance |
| Uniqueness | Usually basic animals | More unique animal designs |
As you can see, paid patterns provide more value but free patterns are great for beginners. With both options, you’ll be on your way to creating a super cute stuffed animal out of yarn! Have fun!
Gathering Your Yarn and Other Supplies
Yarn type and yardage
The type of yarn you choose will determine the texture and feel of your stuffed animal. Soft yarns like wool, alpaca, bamboo, and cotton work best. Stay away from rough, scratchy yarns. As for yardage, here’s a general guideline per stuffed animal:
- Small animals (4-6 inches): 100-200 yards
- Medium animals (7-12 inches): 300-600 yards
- Large animals (13-24 inches): 600-1800 yards
Buy more yarn than you think you’ll need to account for mistakes, second attempts, and embellishments. You can always use leftovers for future projects!
Stuffing materials
Good stuffing creates a soft, huggable stuffed animal. Polyester fiberfill stuffing is lightweight and affordable. For a flatter, flexible animal, try poly-pellets. Organic materials like wool roving or bamboo stuffing make cute eco-friendly stuffies. Just avoid anything that could go lumpy.
Measure out stuffing amounts before starting:
- Small animal: 0.5-1 oz
- Medium animal: 2-4 oz
- Large animal: 1⁄2-3 lbs
Embroidery floss and buttons/safety eyes
Embroidery floss lets you stitch cute facial details like noses, mouths, and blush marks. Opt for cotton floss over shiny rayon. Buttons or safety eyes sewn on with strong upholstery thread make lively eyes for your stuffed critter. Place them far enough apart for a proportional face.
Needles and stitch markers
You’ll need sharp-tipped yarn needles with big enough eyes to thread your yarn. Use stitch markers like safety pins to hold pieces in place as you work. Different color markers help track separate body part pieces.
Scissors and seam rippers
Scissors for cutting yarn should have sharp points for precise snipping. Use seam rippers to open stitches and fix mistakes (we all make them!). Mini seam rippers allow detailed work on small projects. Having the right tools makes crafting cute crochet critters faster and more fun!
Sewing Pieces Together
Understanding the pattern instructions
When starting any sewing project, it’s crucial to carefully read through the entire pattern before picking up your needle and thread. Pay close attention to any tips or special instructions so your stuffed animal turns out just right.
Many patterns will indicate which stitches to use, how large your seams should be (generally 1⁄4 inch), and whether you’ll need to leave certain openings for turning and stuffing later on.
As you go, don’t be afraid to use stitch markers to track seam allowances. These handy little clips or pins make it easy to maintain the specified width. And if anything seems confusing or unclear? Don’t hesitate to look up sewing terms or techniques online to clarify.
Basic hand sewing techniques
While a sewing machine can speed things along, it’s handy to know some basic hand stitches for sewing stuffed animals or toys. The ladder stitch, sometimes called the invisible stitch, works wonderfully for closing up openings with a hidden seam.
And the classic running stitch can attach pieces or embellishments in no time.
Always double-check that your thread tension is balanced – not too tight or too loose. This helps produce clean, even stitches that hold securely without puckering the fabric. It also prevents loose loops that could get caught or pulled.
Leaving an opening for turning and stuffing
As you stitch your yarn creature’s body, be sure to leave a 2-3 inch opening rather than sewing the pieces completely closed all around. This little gap allows you to turn the work right-side out later on. It also provides an access point for stuffing evenly with fiberfill or other materials.
Some tips for these openings:
- Choose a location that will be easy to hidden once closed, like the bottom or one side.
- Secure the seam neatly on both sides of the hole by backstitching or knotting your thread.
- Trim excess seam allowances around the opening to reduce bulk when turning the piece.
Getting clean seams
No one wants messy, frayed raw edges detracting from all the effort put into a homemade stuffed pal. Here are some finishing touches for getting flawless seams:
- If working with felted wool or other fabrics that don’t fray, you can get away with trimmed and pressed seams.
- Otherwise, try clean finishes like zigzag or overlock stitches that bind edges to prevent unraveling.
- For extra security, fold under seam allowances 1⁄4 inch and topstitch them down.
And there you have it! With some basic techniques and a few special tips, you’ll have professional-looking seams on your cuddly yarn creations.
Stuffing and Closing Up
Stuffing evenly and to desired firmness
Evenly stuffing your cute stuffed animal is important for getting that huggable softness just right. Use small bits of premium poly-fil stuffing material and gently fill the shape, taking care not to over-pack any one section.
According to The Spruce Crafts, under-stuffing can cause a stuffed animal to look wrinkly while over-stuffing limits posability. Check the firmness as you go until you reach the desired cozy density.
Ladder stitch for invisible seams
For closing up openings, the ladder stitch is a great option for invisible seams so you won’t disrupt the cute aesthetic of the plushy yarn textures. This stitch goes in and out of the edges, cinched gently together.
The Spruce Crafts recommends working with matching thread and taking care not to pull too tight. Going slowly helps the seam close up while retaining the lovable squish!
Hiding the stuffing opening
Rather than leaving an obvious opening, carefully plan where to conceal the access point before starting to stitch your stuffed animal together. Often the bottom or an inconspicuous area along the back works well.
According to crafters on Instructables, placing the opening on the side of a limb can make reaching the body cavity easier while keeping it subtle and adorable.
Adding Facial Features and Other Details
Embroidering eyes, nose, mouth
One of the cutest things about stuffed animals are their sweet little faces! Embroidering facial features like eyes, nose, and mouth adds personality and makes them simply adorable. Choosing bright floss colors for embroidery like yellow, pink or blue can make them pop.
Backstitch and satin stitch work wonderfully for embroidering clean lines and filling in details (awesome!). Make sure faces are proportionate to the size of your stuffed animal’s head for the most huggable results.
For extra sparkle, gluing a plastic safety nose first before embroidering on a smile or tongue sticking out adds dimension. Plastic safety noses come in great variety packs on Amazon starting at just $8.99 for 144 pieces (Plastic Safety Noses on Amazon).
Tiny rhinestones can also be glued above embroidered eyes for some bling. Who says stuffed animals can’t enjoy a bit of glam too?
Attaching safety eyes or buttons
While embroidered facial features have an old-fashioned, handmade look, plastic safety eyes give stuffed animals a modern manufactured appearance. The most common safety eyes used are round protruding plastic eyes with a flat back and short stem to insert through the fabric.
They come in loads of colors and sizes from 6mm-25mm diameters. Insert the stems through the fabric, add a security washer to the stems so they don’t pull back through, then clamp the backs on 👍.
If working with a particularly small head size where even 6mm safety eyes overwhelm the face, opt for sew-on buttons instead, using strong nylon thread so they don’t loosen over time. Clear plastic buttons subtly suggest eyes while letting the fabric show through for a muted look.
Black or brown buttons paired with embroidered mouths or noses convey expressions like winking or smiling more clearly.
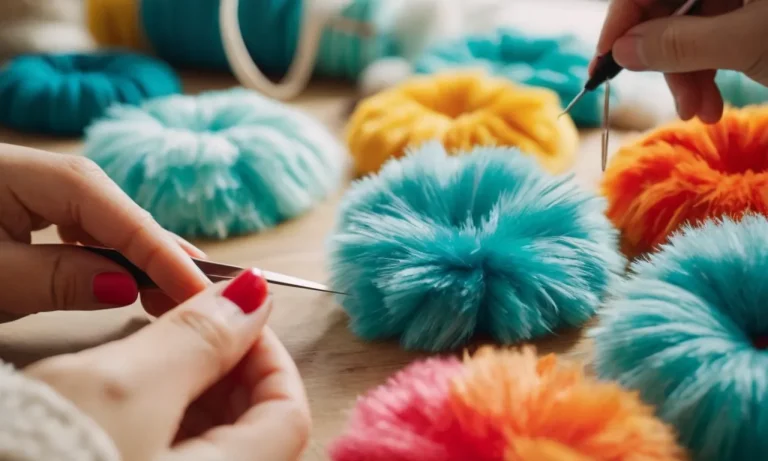
Adding ears, tails, wings or other accessories
What would Mickey Mouse be without his iconic round ears or Minnie Mouse without her oversized polka dot hair bow? Ears, tails, wings, hair bows, glasses – these special details give stuffed animals extra personality!
For floppy ears, cut ear shapes from felt using a cardboard template about 2 inches wider than the head diameter. Sew edges with tight zig zag or satin stitch so they keep their shape. For perky ears with armature, sandwich a thin wire like floral stem wire between two pieces of felt cut exactly the same size before stitching around the edges.
Use jewelry pliers to bend into desired ear shapes. Wings can be made similarly by stitching wire between two pieces of fabric cut into wing outlines and bent upward 😊.
Tails add whimsy whether short nubby ones on a tiger or long curling ones on a monkey. For curling wire tails, wrap faux fur around floral stem wire using hot glue at the top and bottom to define the tail shape before stitching over length for security and to hide wires.
Straight tails can be cut from felt, sewn into long tubes, stuffed lightly, and hand stitched to the animal’s rear 🎉.
| Average US hourly salary for embroiderers | $16.67 |
| Projected US job growth for craft artists 2022-2032 | +5% |
Styling fur or hair
A stuffed animal’s coat whether fluffy angora fur or shaggy long hair goes a long way in making them look huggable. Trimming and styling synthetic furs and fabrics with varying pile lengths and textures adds beautiful dimension.
Try varying paw pad or muzzle colors by stitching on brown, black or pink felt then use tiny scissors or razor combs to trim the surrounding fur shorter. For longer haired critters, use sharp scissors or seam rippers to add bangs, layers or shape fur direction.
This helps convey personality and movement for inquiries like ears perked up or floppy bangs in eyes. The possibilities for unique looks are endless!
To keep fur smooth, brush periodically with a stiff bristled brush or even an old toothbrush. For minor touchups, use fabric steamers. To deep clean stained or matted fur, handwash gently and air dry thoroughly upside down to maintain fur direction 👏.
Proper care ensures your furry friends stay cuddly and beautiful inside and out!
Tips for Taking Your Skills Further
Trying more complex patterns
Once you have mastered the basics of yarn stuffing and sewing, try taking on more complex stuffed animal patterns to expand your skills. Amigurumi patterns often employ advanced techniques like working in the round, invisible decreases, and embroidery details.
Test your abilities with animals that have long, spindly limbs or delicate color changes. Learning on your own can be challenging, so don’t hesitate to sign up for an advanced workshop or class. With some perseverance, you’ll be cranking out intricate, professional-looking amigurumi in no time!
Customizing with your own designs
After following patterns for a while, put your own creative spin on your yarn creations! Sketch out an original character or select a favorite animal not readily found in pattern books. Determine the key features and proportions before drafting a pattern yourself.
Customization allows you to use signature color combinations, unique textures, or personalized sounds like jingle bells inside. Show off custom stuffies at Etsy craft fairs to gauge interest and access an audience beyond your inner circle of friends and family.
Entering craft fairs or selling on Etsy
Consider leveraging your stuffed animal skills to earn some extra income! Craft fairs provide opportunities to display your special brand of soft sculpture. Interacting with potential buyers allows you to gain valuable feedback and understand pricing considerations.
Due to the handmade quality, stuffed animals often fetch $40-60 each. For wider exposure minus travel considerations, open your own Etsy shop. Stand out with quality photos presenting animals in charming vignettes with props or backdrops.
Update your shop regularly with seasonal designs and maintain enough inventory to allow quick shipping.
Perfect for gifts: Making sets or stuffed animals for children
Yarn stuffed animals make wonderful gifts! Create a coordinated set of amigurumi animals like a little girl’s tutu-wearing elephant, zebra, and panda. Make each one unique with embroidered facial features and props like reading glasses or musical instruments.
Such personalized details convey extra thoughtfulness. Stuffies also delight children of all ages. Craft extravagant themed collections featuring wizards, fairies, and dragons to inspire imaginary play.
When gifting to children under 3 years old, ensure safety by using high-quality, child-safe materials and reinforce all stitches and connections to avoid detachment issues. Your stuffies may just become a child’s most cherished toy!
| Average Price for Handmade Stuffed Animal | $40-60 |
| Recommended Age for Children Receiving Stuffed Toys | 3+ years |
Conclusion
Creating adorable stuffed animals out of yarn is an enjoyable craft that lets you produce cute handmade plushies. By following patterns, gathering supplies, sewing pieces, stuffing firmly, and adding decorative details, you can make a wide range of unique stuffed animals.
With this guide explaining the key steps and techniques, you now have all the information you need to start on your own homemade stuffed animal projects. So grab some yarn, choose a fun pattern that inspires you, and have fun bringing cuddly yarn creations to life!